organic gardening

How to Plant & Grow Seed Potatoes

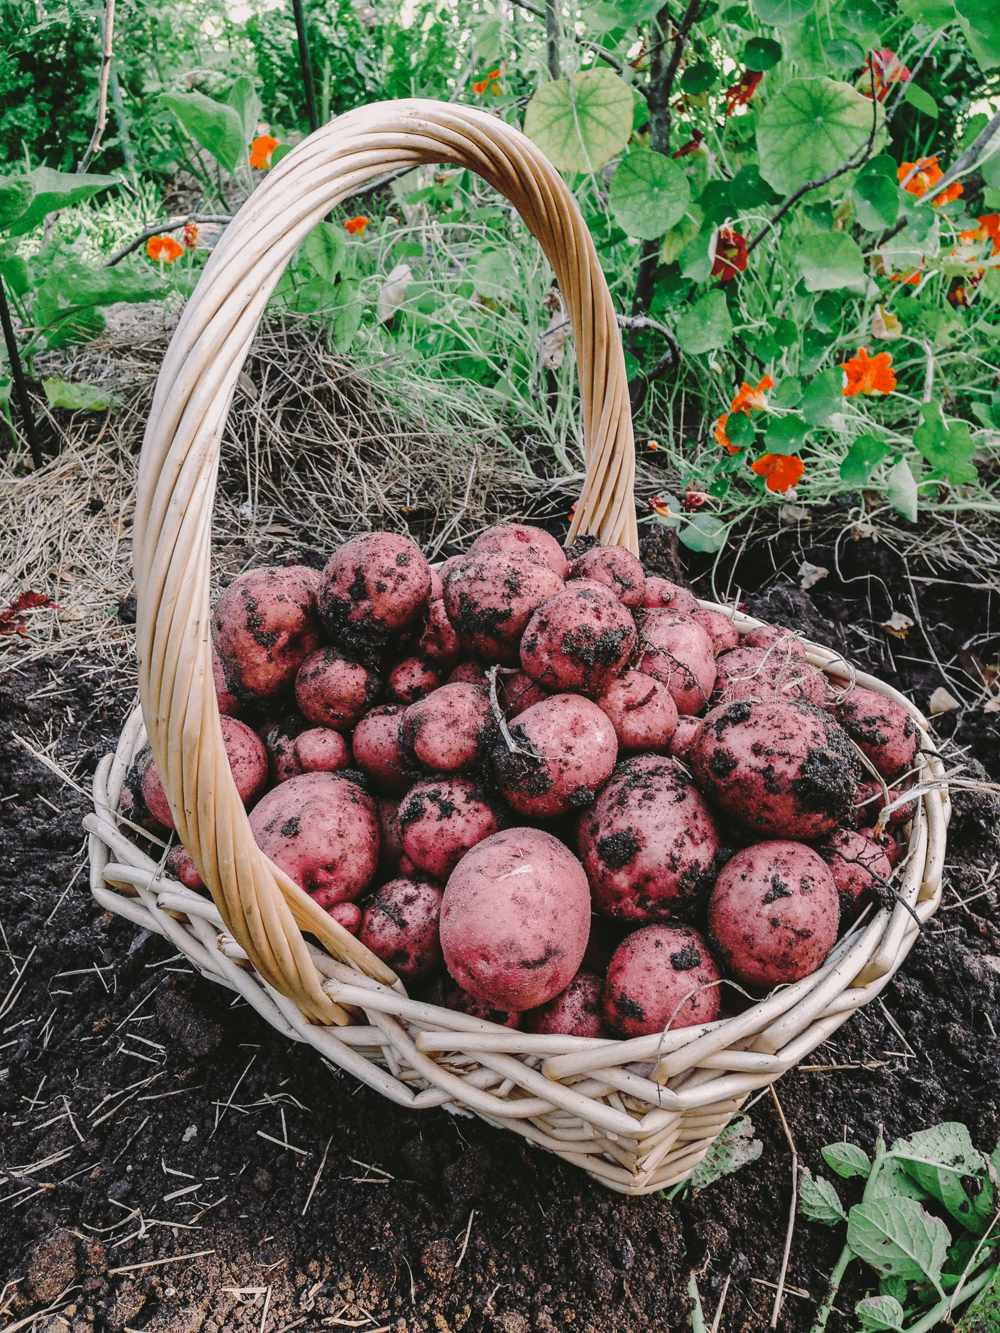
To me, all homegrown vegetables taste better than store bought. A few, however, taste so much better homegrown that I almost never bother buying them from the store. Tomatoes, eggplant, broccoli and cucumbers all fall into this category. I never thought that potatoes would be included until I finally grew them at home for the first time five years ago. A spud was a spud, I assumed, and they were so inexpensive in the grocery store anyways. The whole process of growing and “hilling” potatoes also intimidated me.

Indeed, I was wrong. I grew Red Pontiacs that first year and have ever since. Garden-fresh potatoes are so creamy and smooth, they truly taste as if they’ve already been buttered-up for you. My favorite recipe for them includes fresh garden sage leaves, and is so simple, easy and delicious, it has become one of my favorite dishes. I love this recipe so much; I tried making it after I ran out of potatoes one year and substituted them with store-bought. Well I learned my lesson. The homegrown potatoes were what made the dish so delicious. Those grocery spuds tasted like wax in comparison. How disappointing.

Potatoes are also pretty easy to grow. Here in Tallahassee they are traditionally planted around Valentine’s Day, and harvested by May. My friends Katie and Aaron, who run Full Earth Farm in Quincy, have a traditional Valentines Potato-date every February.

IMG_2589+copy.png
growing-potatoes

PLANTING METHOD

SEED: You’ll start with seed potatoes, which are just small potatoes that are disease-free and ready to plant. I recommend purchasing these seed potatoes from a local nursery; grocery bought potatoes are treated with a growth inhibitor and may carry disease. Cut these whole seed potatoes into pieces with one or two eyes, each cut piece being golf-ball size or larger. Although small potatoes need not be cut. Let these pieces dry overnight before planting to reduce the likelihood of rot.

SOIL: Potatoes like loose soil rich in organic matter, so work finished home compost or mushroom compost into your bed. There are many ways to plant potatoes, but the easiest and most reliable method I’ve found is as follows; Loosen up soil in your bed and remove any weeds. Make a trench 10 inches wide and 4 inches deep on level ground. If you have multiple rows, they should be at least 36 inches apart. If you haven’t already worked compost into the bed, you can add a layer of compost to the bottom of the trench. Use only finished mature compost that has completely broken down.

PLANTING: Drop potato pieces into the trench about 12 inches apart and bury 3-4 inches deep. If you want to increase the size of your harvest, you can “hill up” the potatoes once the foliage has reached 6-8 inches tall. This means you would pull soil up around the base of the plants, leaving 4 inches of the plant above soil level. Be careful not to damage the roots of the plants. Hill a second time 2-3 weeks later if your desire. Mulch with pine or hay straw once you have finished hilling, to prevent weeds. Hilling the soil increases potato production but is not necessary if you can’t find the time or inclination. I still get a good size harvest on years I haven’t had the time to hill.

By the end of April, the green tops will start yellowing and dying back and that means those little taters are sizing up underground. I use a garden fork to lift up the tubers with the least amount of damage. This is my favorite part of the growing process, because it feels like you’re digging up buried treasure. Now all there's left to do is harvest and set a potato date!

Garden to Table: Broccoli, Kale & Red Cabbage Harvest Salad with Satsuma-Ginger Dressing

This salad is so easy and fast to prepare! And there is nothing better than harvesting your own salad ingredients from your own vegetable garden. The bite sized broccoli pieces along with dried raisins add that crunch/sweet factor that so great in salads. You can also experiment leaving the recipe as is, or making it a complete meal by adding a healthy grain like quinoa or wild rice.

Another bonus about this salad? It stores really well so you can make a big batch and then take leftovers with you to work for a couple days. 

Broccoli and Kale are both super healthy, low calorie, high-nutrient vegetables that have a long list of health benefits which include reducing the risk of reproductive and bowel cancers, improving the detoxification pathways, and providing a myriad of nutrients.  Cruciferous vegetables (such as broccoli, kale, cauliflower, cabbage, chard, and mustard greens) are said to be detoxifying because they provide support for the immune system, inflammatory system, and antioxidant system. These vegetables contain a wide variety of vitamins and minerals as well as phytonutrients. Famed nutritionist Dr. Christine Maren suggests consuming several servings of cruciferous vegetables each week for maximum benefit.

As we get into fall now is the perfect time to start planting these vegetables in your winter garden!

Ingredients: 

Salad:
1 bunch of broccoli
5 packed cups of chopped kale
1/4 cup shredded red cabbage
1 tbsp coconut oil
1 small fennel bulb (thinly sliced)
½ cup raisins
1 small apple
½ small red onion (thinly sliced)
¼ cup walnut halves, toasted and chopped

Dressing:
¼ cup extra virgin olive oil
¼ cup fresh satsuma or orange juice
1 teaspoon orange zest
1½ Tablespoons apple cider vinegar
1 inch of fresh ginger, peeled + roughly chopped
1 tablespoon pure maple syrup
salt and pepper, to taste

Method:

Remove stems from kale and chop the leaves into bite-sized pieces. Place the kale into a large bowl and massage with coconut oil. Chop broccoli into bite-pieces, shed the red cabbage and toss with the kale along with fennel, red onion and chopped walnuts. Then remove the apple core and shave thin slices over the dish. 

To make the dressing, combine all the ingredients until you have a smooth consistency. Drizzle over salad and season with salt and pepper. Garnish with chopped walnuts and fennel fronds. Add cooked wild rice or wheat berries for a meal salad.

Growing Organic Kale is Easy, Even for Beginners!

I eat at a lot of kale at this time of year. My young kale seedlings are just getting started and will soon produce bountiful harvests. I enjoy homegrown kale in salads, soups, sautéed, and even on pizzas. I especially love to mix it with fruits like apples, blueberries or pineapple, to make fresh green smoothies in my blender.

Kale is renowned as a nutritional powerhouse. Its health benefits are primarily linked to the high concentration of antioxidant vitamins A, C, K, and sulphur-containing phytonutrients. One cup of chopped kale contains only 33 calories, yet it yields abundant calcium, vitamins A, C, and lots of vitamin K. It is also a good source of minerals copper, potassium, iron, manganese, and phosphorus.

Eating more kale is an easy way to improve the quality of your diet, and growing your own is easier than you think, even if you have little or no experience with vegetable gardening. Fall is the best season for beginners here in Tallahassee and kale is an excellent introductory crop to grow.

For beginners, start out with fresh, healthy plants from your local nursery. You will want at least three plants to have adequate harvests. There are a variety of kales to choose from; my favorites are Lacinato, Dwarf Blue Curly and Red Russian.

Choose a site for a bed or container that gets the most sun in your yard. Even if you have only 3-4 hours of sun, choose the sunniest spot and you will still enjoy harvests. Kale is tolerant of partial shade, but will grow a little slower.

To prepare your bed:

1)    Remove all existing vegetation first, roots and all. This is important as you don’t want pesky sod or weeds competing with your kale for water and nutrients. Your bed can be as long as you need, but remember to not make it wider than four feet so you can still reach across to weed and harvest.

2)    Dig your bed at least a foot deep to loosen up existing soil and break up any tree roots within the bed. You can use a quality round point shovel, heavy duty garden fork, or a mattock. Add a fresh layer of mushroom compost, at least six inches, to your soil.

3)    Dust a layer of organic, granular, slow-release fertilizer like Espoma’s Plant-tone across the compost. If you have quality compost, you can tuck your kale plants right into it, allowing a good 8-10” between plants. Plant the stem just an inch deeper than it is in the pot. Water them in thoroughly with a gentle spray nozzle, and regularly check their watering every few days.

I would also encourage anyone, even beginners, to try growing from seed. Some crops can be difficult, but kale is very easy from seed. Just prepare your soil, sprinkle the seeds over and cover the seed bed with only a light dusting of soil, then water well. The bed should be watered regularly and the seedlings will appear within two weeks. Once they are 3-4” tall, I dig, separate and space them out where want them.

Newly planted kale will take a week or so to establish roots, and then will begin growing. When the plants reach 6” you can begin harvesting leaves. Always harvest the lower leaves first, leaving a few newer top leaves so the plants can continue growing. Watch them grow and keep an eye out for caterpillars, the most common pest on kale. If you begin to see holes in the leaves, look under those leaves and you will likely see a caterpillar. Don’t fret.  

You can just squish them or safely treat them with Dipel dust; a biological insecticide that only kills caterpillars, breaks down quickly and is safe for your organic garden.

Enjoy your harvests of fresh, organic kale well into early spring. Below I’ve included one of my favorite, mouthwatering kale salad recipes for inspiration.

kale_salad.jpg

Ingredients

4-6 cups Lacinato kale, sliced leaves, midribs removed.
Juice of 1 lemon,
3-4 tablespoons extra-virgin olive oil
2 cloves garlic, mashed.
Salt & pepper, to taste.
Hot red pepper flakes, to taste
2/3 cup grated Pecorino Toscano cheese, or other flavorful grating cheese such as Asiago or Parmesan
1/2 cup freshly made bread crumbs from lightly toasted bread

Instructions

  1. Whisk together lemon juice, olive oil, garlic, salt, pepper, and a generous pinch (or more to taste) of hot red pepper flakes. 

  2. Pour over kale in serving bowl and toss well.
  3. Add 2/3 of the cheese and toss again.
  4. Let kale sit for at least 5 minutes. Add bread crumbs, toss again, and top with remaining cheese.