Get a handle on homegrown tomatoes in containers!

If any vegetable is worth growing at home, it is the tomato. Most store-bought varieties are selected for traits like durability, productivity, disease-resistance, uniformity, and roundness, but not necessarily taste. Even the most expensive grocery store ‘mater can’t compare in flavor to a truly well-ripened homegrown tomato.

Tomatoes are therefore an ideal ‘gateway’ vegetable for folks interested in vegetable gardening, and growing in containers is a great way to start. Digging in the ground can seem intimidating and pots require little planning: whether on your lawn, deck, or driveway, you’ll only need a spot with at least half a day of direct sunlight.

If you’ve tried growing container tomatoes before and failed, it was probably due to your choice of container. At least a seven-gallon size container is required for each tomato plant, although for dwarf or bush varieties you could successfully use a five-gallon pot. It’s tempting to skimp on the size, but beware. If you plant in a smaller container, you will be watering several times a day once July rolls around, and you will still likely have serious consequences.

Tomatoes need a lot of water to sustain all of their growth in the heat of the Florida sun. They can dry out rapidly, and while they may bounce back, the fruit will split or suffer from blossom-end rot, making it inedible. Drying out also stresses the entire health of the plant, weakening its immune system, and making it more susceptible to pests and disease. Many of the “problems” people experience with growing tomatoes are actually secondary symptoms of insufficient watering. For this reason, I prefer using plastic containers rather than terra cotta, because they retain more moisture, and they’re lighter and easier to move. I’ve also had really great success with large, reusable grow-bags.

The container you choose must have adequate drainage. I have too often seen big box stores selling planters that have tiny, inadequate drain holes – or even none at all! This is a setup for certain failure. Plants in soil with poor drainage will result in bacterial growth that quickly rots your plants.

For soil, I like to use a mixture of about one-fourth mushroom compost and three-fourths potting soil. I also add a cup of Espoma’s Tomato-tone fertilizer, a handful of worm castings, and a tablespoon of Epsom salts.

It is especially important to plant your young transplant deeply in your pot. Pinch off the lower leaves along the stem, and plant the tomato as deeply in the soil as the size of your transplant allows; making sure to keep at least three inches of the growing tip above the soil.

Wild tomatoes native to South America are rambling, perennial vines with small, usually yellow, fruit. The vines grow on the ground, and are able to put out roots all along their stems to sustain the large vines with adequate water and nutrients. When we trellis or stake tomato plants, they are unable to root from their stem, which makes it difficult for them to source all of the water and nutrients they need to support their vigorous growth. This is why planting tomatoes deeply is key.

You will need a strong and sturdy tomato cage, or a stake of at least one-inch diameter and six feet tall to support most tomato plants. I use thick, six-foot cypress or bamboo stakes and then use twine to loosely wrangle the stem. Most tomatoes grow at least six feet tall with multiple stems, so you’ll have to keep up with the twine as it continues to grow.

Choosing the right variety of tomato is also important. I always recommend cherry-sized or small slicing tomatoes for pots. They are just generally more productive and easier to grow than the big beefsteak types, which can be finicky. They’re also more tolerant of shade.

A few of my favorite varieties for pots are Sungold cherry, Juliet, Jaune Flamme, Dark Galaxy, and Nyagous. These varieties are all early ripening, productive, and most importantly, delicious!

Safe Solutions - Natural Herbicides

Safe Choices for Weed Control

For homeowners looking for products that will help them in their constant battle with weeds, products that will not harm them, their children, their pets or the planet, the news is good. In recent years, there have been some great new products; and now for the first time, we even have a safe, selective herbicide to offer. Finally you can kill weeds in your lawn without harming the grass and without using 2,4-D. It’s called Weed Beater Fe (active ingredient is iron HEDTA - soluble iron); and from what I’ve read so far, it seems to be somewhat effective on some weeds and very effective on others (oxalis for one). Here in Florida we can even use Weed Beater Fe in the winter, as long as you have weeds actively growing. However, do not apply this product on days when the daytime temperature will exceed 85°. If your lawn needs water, irrigate it first and then apply the product after the grass has dried. Weed Beater Fe is available in a ready-to-use formulation only (quarts and gallons).

Maize Weed Preventer is an effective, natural pre-emergent herbicide (suppresses weed seed germination). It is a ready-to-spray liquid formulation (one quart bottle—attach it to your hose) of corn gluten. Because it does not have nearly as much nitrogen as the granulated form, it can be used earlier in the season and more often. According to the manufacturer, you can use Maize up to four times per year. Wait at least a month between applications.  It is best to apply this product in the spring and fall when temperatures do not exceed 90°. If you must apply Maize Weed Preventer during the heat of the summer, water your lawn in the morning and then apply Maize in the evening after the temperature drops below 90°. As with Weed Beater Fe, you should always avoid using this product when your lawn needs irrigation—irrigate first, then apply after the grass dries. Definitely do not apply Maize in newly seeded areas as it will suppress all seed germination (not just weed seeds).

We have two safe products for when you are in need of a contact herbicide. These products are usually used around driveways and sidewalks and around the base of mature trees, buildings and fence lines. Care must be taken if you use them on weeds in close proximity to plants you do not want to harm. They will kill or damage any plant you apply them to. Bonide BurnOut is rainproof when dry, works at temperatures as low as 40° and does not translocate. Made from natural ingredients (citric acid and clove oil), BurnOut is approved for organic gardening and is safe for use around people and pets. It’s available in concentrate and ready-to-use formulations (one quart bottles). Monterey Herbicidal Soap (active ingredient - Ammoniated Soap of Fatty Acids) is an environmentally-friendly product that quickly controls and kills moss, weeds and algae and also does not translocate. It is fast acting, providing results within hours after application. It may be used whenever desired but is most effective during warmer weather. It does not stain bricks, concrete or asphalt. We originally began stocking Monterey Herbicidal Soap at the request of a customer who uses it to control poison ivy but got tired of paying the freight charges that came with online ordering. We’ve since had good feedback from other customers trying this herbicide for the first time. It comes in a one gallon concentrate.

So if (when) you have problems controlling weeds in your landscape and you get tired of pulling, come see us and we can help you choose the right (safe) product for your situation.

How to Plant & Grow Seed Potatoes

To me, all homegrown vegetables taste better than store bought. A few, however, taste so much better homegrown that I almost never bother buying them from the store. Tomatoes, eggplant, broccoli and cucumbers all fall into this category. I never thought that potatoes would be included until I finally grew them at home for the first time five years ago. A spud was a spud, I assumed, and they were so inexpensive in the grocery store anyways. The whole process of growing and “hilling” potatoes also intimidated me.

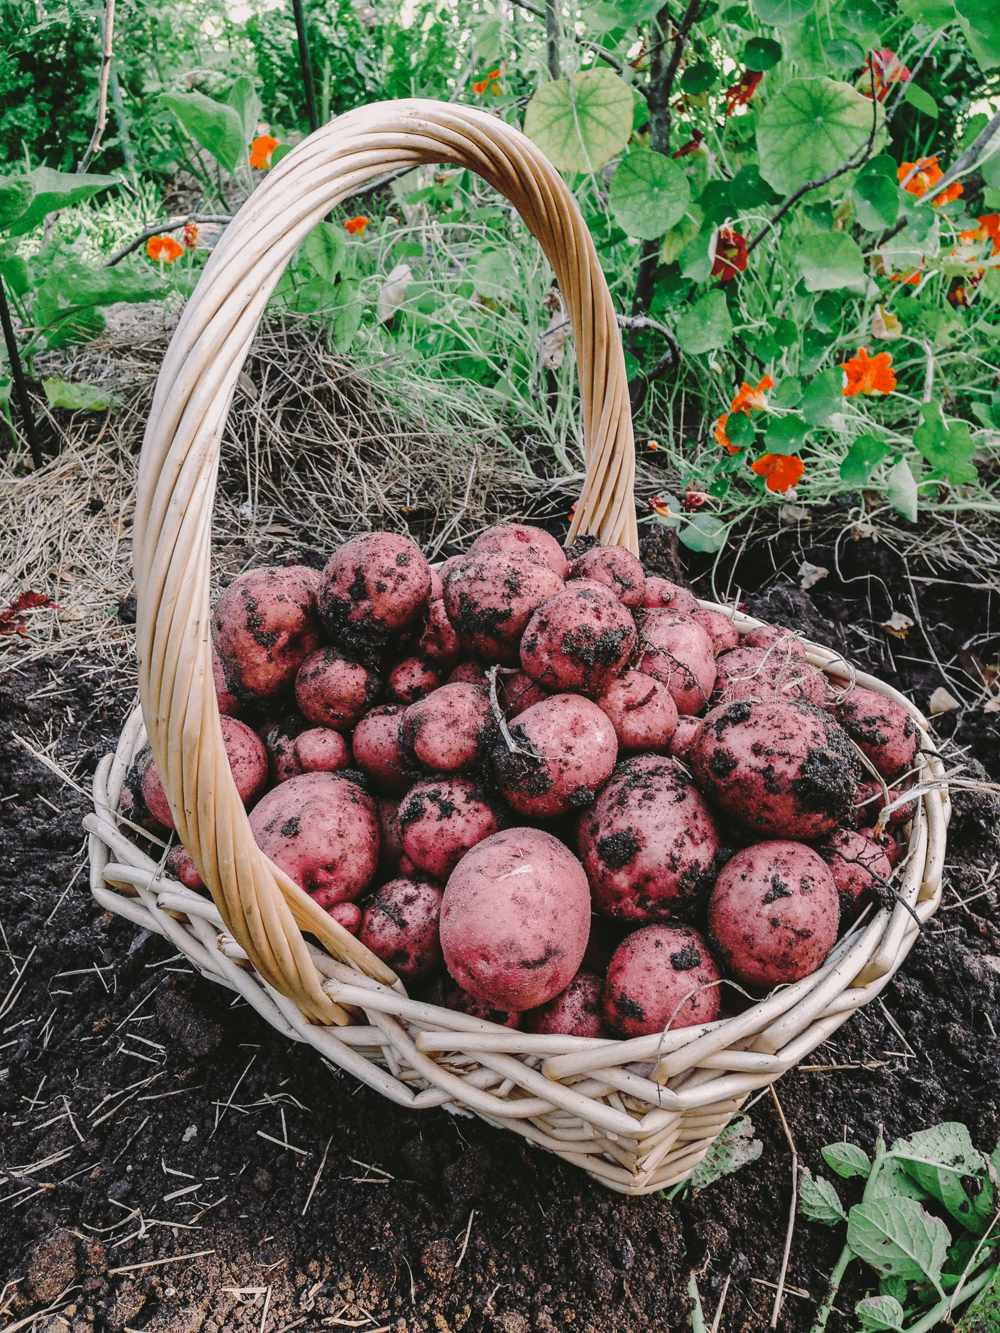
Indeed, I was wrong. I grew Red Pontiacs that first year and have ever since. Garden-fresh potatoes are so creamy and smooth, they truly taste as if they’ve already been buttered-up for you. My favorite recipe for them includes fresh garden sage leaves, and is so simple, easy and delicious, it has become one of my favorite dishes. I love this recipe so much; I tried making it after I ran out of potatoes one year and substituted them with store-bought. Well I learned my lesson. The homegrown potatoes were what made the dish so delicious. Those grocery spuds tasted like wax in comparison. How disappointing.

Potatoes are also pretty easy to grow. Here in Tallahassee they are traditionally planted around Valentine’s Day, and harvested by May. My friends Katie and Aaron, who run Full Earth Farm in Quincy, have a traditional Valentines Potato-date every February.

IMG_2589+copy.png
growing-potatoes

PLANTING METHOD

SEED: You’ll start with seed potatoes, which are just small potatoes that are disease-free and ready to plant. I recommend purchasing these seed potatoes from a local nursery; grocery bought potatoes are treated with a growth inhibitor and may carry disease. Cut these whole seed potatoes into pieces with one or two eyes, each cut piece being golf-ball size or larger. Although small potatoes need not be cut. Let these pieces dry overnight before planting to reduce the likelihood of rot.

SOIL: Potatoes like loose soil rich in organic matter, so work finished home compost or mushroom compost into your bed. There are many ways to plant potatoes, but the easiest and most reliable method I’ve found is as follows; Loosen up soil in your bed and remove any weeds. Make a trench 10 inches wide and 4 inches deep on level ground. If you have multiple rows, they should be at least 36 inches apart. If you haven’t already worked compost into the bed, you can add a layer of compost to the bottom of the trench. Use only finished mature compost that has completely broken down.

PLANTING: Drop potato pieces into the trench about 12 inches apart and bury 3-4 inches deep. If you want to increase the size of your harvest, you can “hill up” the potatoes once the foliage has reached 6-8 inches tall. This means you would pull soil up around the base of the plants, leaving 4 inches of the plant above soil level. Be careful not to damage the roots of the plants. Hill a second time 2-3 weeks later if your desire. Mulch with pine or hay straw once you have finished hilling, to prevent weeds. Hilling the soil increases potato production but is not necessary if you can’t find the time or inclination. I still get a good size harvest on years I haven’t had the time to hill.

By the end of April, the green tops will start yellowing and dying back and that means those little taters are sizing up underground. I use a garden fork to lift up the tubers with the least amount of damage. This is my favorite part of the growing process, because it feels like you’re digging up buried treasure. Now all there's left to do is harvest and set a potato date!